

Managing content and freelancers in MediaOS helps you keep your production workflow organized and efficient. Whether you're assigning stories, tracking deadlines, or collaborating with freelance contributors, the system gives you the tools to oversee every stage of the content lifecycle.
Creating Content #
To begin creating content in MediaOS, navigate to the Content section at the top of the screen. This workspace offers everything you need to create, manage, and organize editorial or sponsored content with structure and clarity. Once inside, click the blue + New Content tab to start the process. A dialogue box will appear, prompting you to enter key details about the article you're creating.
You’ll begin by assigning a name and description to your piece. Additional fields allow you to define how many pages the article will span in print, set a due date, allocate a budget, assign a team member, and choose a status to reflect where the article sits in your pipeline.
To align the content with campaign goals or advertiser obligations, you can also use the Connect With section to link the article to a specific advertiser, line item, or product. This ensures all relevant teams have visibility into how editorial and monetized content intersect and keeps your workflows fully integrated within the MediaOS ecosystem.
Click Update to create an article.

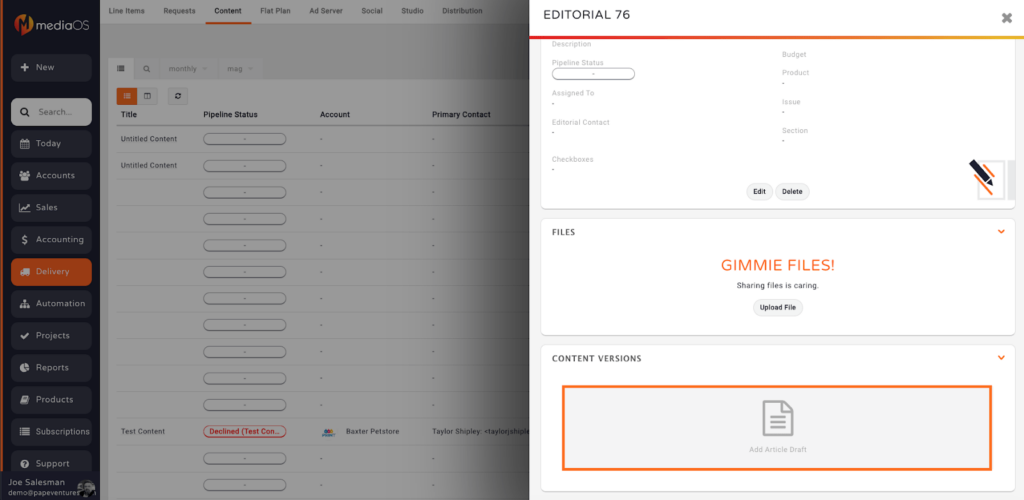
Note: You can upload files, link to a Google Doc or write the article inside MediaOS’s word processor by selecting Add Article Draft under the Content Versions box.
Managing Freelancers #
Keeping track of freelance work can often be a complex and time-consuming task, but the freelance management tools in MediaOS are designed to streamline this process. With just a few clicks, you can send, assign, and track freelance assignments, giving you full visibility into who is working on what and when it's due.
All freelance work in MediaOS is tied to a block of content, meaning that to assign a freelancer, you must first access the specific content piece. Start by clicking Delivery in the left-hand navigation menu, then select the Content tab to view all your articles and editorial entries. Find the content you'd like to assign and click View. At the bottom of the Content Details window, you’ll find the Freelancer Assignments section, which is where all freelance task management takes place.
Creating a New Assignment #
To create a new assignment, click the New Assignment button within this section. A dialog box will appear, prompting you to complete the necessary fields. Under Freelancer Select, choose the freelancer you wish to assign. If the freelancer has not yet been configured in your system, you can click New Freelancer to input their name and email address.
Next, define the Type of assignment—whether it's Content, Photography, or both. Then, enter the Amount, which represents the agreed-upon payment for the assignment, and specify the Due Date for delivery. In the Description & Instructions field, you can provide detailed notes or guidelines that will appear in the freelancer’s email.
Once all information is entered, click the Send button to dispatch the assignment to your freelancer. The Freelancer Assignments section will automatically update to reflect the assignment’s details, including the assigned freelancer, payment amount, due date, assignment type, and status. You’ll also be able to view any attached documents shared through the portal.
If needed, you can resend or cancel an assignment directly from this section, making it easy to keep your freelance workflow agile and up to date. Yep, it's that easy!

