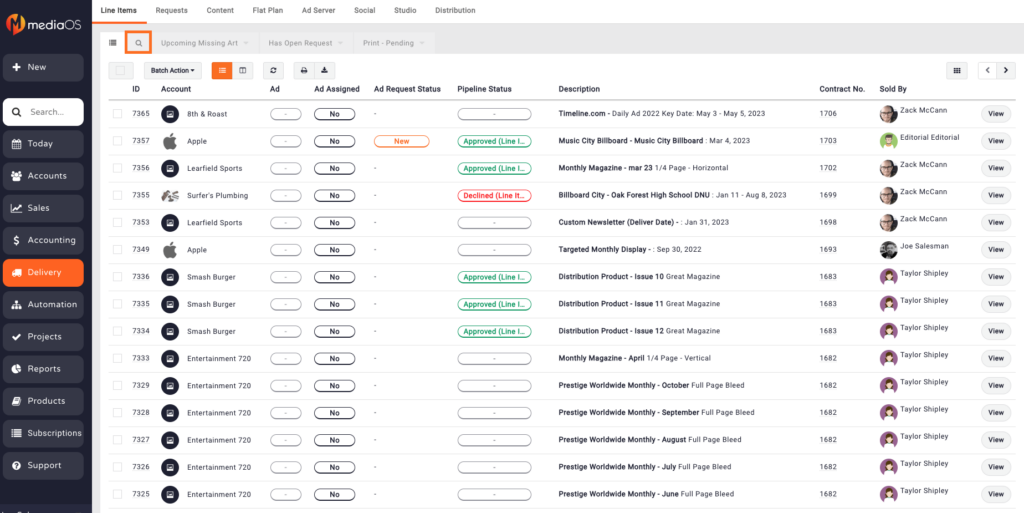
The Line Items page allows you to easily track, filter, and view a list of all items sold to your customers.
Customizing the Line Items Page View
- Click the Delivery tab from the left-hand menu.
- Select the grid icon from the top, right-hand corner of the screen.

- Choose the columns you’d like to view by adding them to the Visible column.
- Set up filtered tabs by clicking Save as New Tab in the filter section, name the tab, and click Save.
The following columns are available to include on the Line Items report. Please note that there is a 10 column limit.
| Column Name | Description |
|---|---|
| ID | Displays the ID number for the line item |
| Account Name | Displays the name of the account the line item was booked for |
| Ad Assigned | Displays whether or not an ad is assigned to the line item. |
| Ad Request Status | Displays the status assigned to the ad request associated with the line item. If there is no ad request for the line item this field will appear blank. |
| Pipeline Status | Displays the pipeline status assigned to the line item |
| Description | Displays the description of the line item, including the product, unit size, and issue name. |
| Issue Date | Displays the date the issue will be released. For issue based products only. |
| Contract No. | Displays the contract number the line item is tied to. |
| Sold By | Displays the name of the user who sold the contract |
| Ad | Displays a thumbnail image of the ad assigned to the line item. |
| Ad Height | Displays the height measurement of the ad unit assigned to the line item. |
| Ad Width | Displays the width measurement of the ad unit assigned to the line item |
| Ad Rate Name | Displays the name of the rate assigned to the line item. This is set on the contract edit screen. |
| Ad Rate Net | Displays the total net value of the ad rate assigned to the line item. |
| Agency Name | Displays the name of the Agency associated with the contract the line item belongs to. |
| Auto Renew | Displays whether a line item is set up for automatic renewal. |
| Contract Canceled | Displays the the date the contract associated with the line item was cancelled |
| Date Sold | Displays the date the contract associated with the line item was sold. |
| Deliver Date | Displays the date the line item is set to be delivered. For delivery based products only |
| Start Date | Displays the date the line item is set to begin running. For time based products only |
| End Date | Displays the date the line item is set to stop running. For time based products only |
| Insertion Canceled | Displays the date the line item was canceled. |
| Issue | Displays the name of the issue assigned to the line item. |
| Line Item Run Date | Displays the date any line item is set to begin running. Universal for all products. |
| Location | Displays the location assigned to the line item. For location based products only. |
| Owned By | Displays the owner of the account the line item is assigned to. |
| Page No. | Displays the page number the line item has been assigned to on the flat plan. For issue based products only. |
| Page | Displays the amount of pages the line item will contain. For issue based products only |
| Placement | Displays the placement for the line item. For issue based products only |
| Placement Notes | Displays any notes entered on the contract describing instructions for the line item's placement. For issue based products only |
| Product | Displays the product the line item belongs to |
| Product Type | Displays the product type associated with the line item's product. |
| Quantity | Displays the amount of items to be delivered for the line item. This is set on the contract edit screen. |
| Section | Displays the section assigned to the line item. For issue based products only. |
| Size | Displays the unit size assigned to the line item. |
| Terms | Displays the contract terms & conditions associated with the line item. |
Filtering the Line Items Page
To better analyze your line items use the filter button and the multiple sorting options available to you.
- To access the accounts filter, select the Delivery tab from your left hand side navigation panel.
- Select the Filter icon to open the filter table.
- Choose your filter and sorting options and then click on FILTER to generate results. Selecting enter/return on your keyboard will not generate results, you always have to select FILTER.


