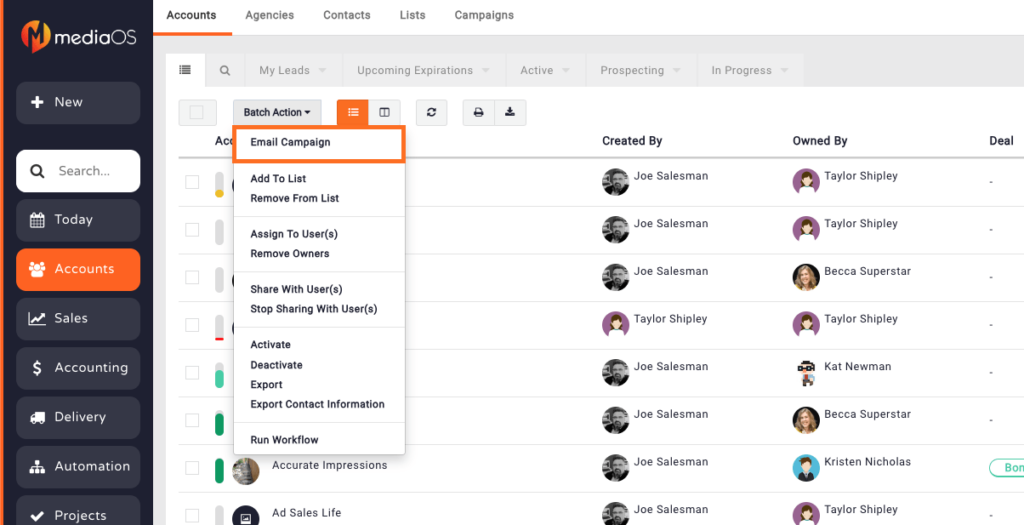
Looking to reach your entire client base quickly? Email blasts allow you to easily schedule and send campaigns to all, or a segment, of your accounts.
- Click on the Accounts tab on the left-hand menu.
- Select the magnifying glass in the search menu.
- Choose your list from the In List search bar that’s located on the right side.
- At the bottom of the screen, you’ll see the list you’ve chosen.
- Click the Batch Action dropdown menu.
- Choose Email Campaign.

- In the top, left, type in campaign name and which emails to send.
- Click Next.
- Choose a template or click New Template from the top (If creating a new template, drag and drop email components to create.)
- Click Save.
- On the left-hand side, fill in the from email, from email name, and subject line
- Schedule the time and date the email should be sent. Please note that email campaigns may be delayed up to 15 minutes from the original scheduled time.

- From the Campaigns tab in Accounts, you can view the email campaigns you’ve created/scheduled (how many sent, opened, clicked, etc.). You can also edit and preview the email from here. Or, you can clone the campaign and send to a different list.


