

Launching an email campaign is all about delivering the right message to the right audience at the right time. Email Campaigns inside of MediaOS allow you to reach out to your customers in a quick and efficient manner. In addition to creating and sending out your campaigns, MediaOS will track email opens, clicks, and any errant email addresses you may have in your system.
Getting Started #
Whether you're promoting a product, sharing news, or nurturing leads, every step counts — and we’ll guide you through it. To get started on an Email Campaign, click Accounts using the left-hand navigation menu. Then, select the checkbox next to each account you would like to include in your email campaign.
Note: If you want to send a campaign to all of your accounts, skip the previous step, and the system will add all accounts in the search results to the campaign.
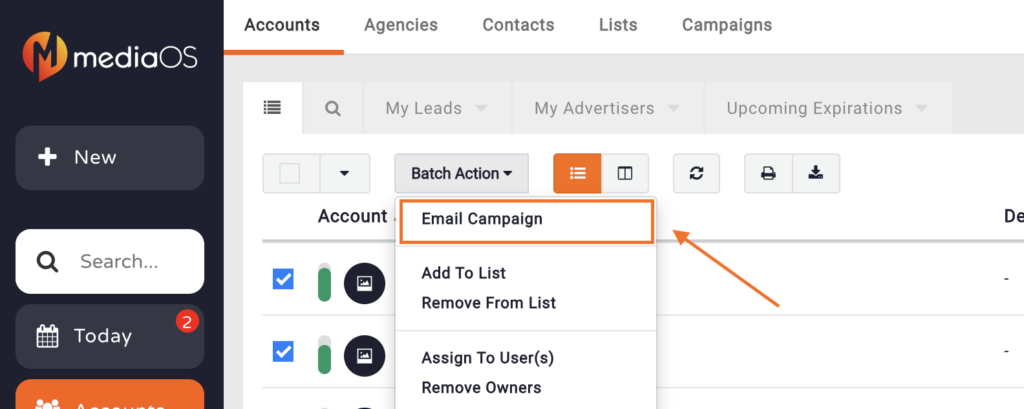
Click the Batch Action button and select Email Campaign to display the Email Campaign Wizard.
With the Email Campaign Wizard open, you now have to configure the settings of your email campaign.
Configuring Email Campaign Settings #
To configure your email campaign settings, you're going to want to start in the New Campaign section. Give your campaign a recognizable name — this will help you identify it later among your other campaigns.
Next, choose who will receive your email using the Which Emails drop-down menu. You can send your campaign to all emails associated with accounts and contacts in your results, or narrow it down to more specific groups. The Primary Advertiser Email option targets only the main email listed on each account. Selecting All Advertiser Emails sends the campaign to every email directly assigned to an advertiser but not tied to a contact. If you'd prefer to only reach individuals linked through contact records, choose All Contact Emails. To avoid sending multiple copies of the same campaign to a single person with several account associations, you can check the Only Send a Single Email per Unique Email box — this is optional but highly recommended for all campaigns.
You’ll also need to specify which accounts to target. In the Select Results section, decide whether to send your campaign to the accounts you've selected manually on the Accounts page, or to all accounts that matched your search criteria.
Once your recipients are selected, click Next to move on to template selection. Browse your available templates in the window on the right — hover over the one you want and click Select to choose it. If you haven’t created your template yet, you can refer to this article with full instructions on how to do so.
After choosing your template, click Next again to enter your sending details. This includes the Subject Line of your campaign, the From Email Address that the emails will be sent from, and the From Name, which is the display name tied to that sender email.
Finally, proceed to the Schedule section to set when your campaign will go out. Choose the Send Date and Send Time that work best for your audience. When everything looks good, click the Schedule Campaign button to review an overview of your entire email campaign before it’s sent.
Updating a Campaign Before It Sends #
You may need to reschedule or adjust your contact list prior to sending a campaign. To make changes to an existing campaign, navigate to the Campaigns tab within the Accounts section. Locate the campaign you want to update, then click Options next to it.
From the dropdown, select Edit to reopen the campaign wizard. This allows you to adjust any of the previously configured settings, including the template, recipient list, sending details, or schedule — just like when you first created the campaign.
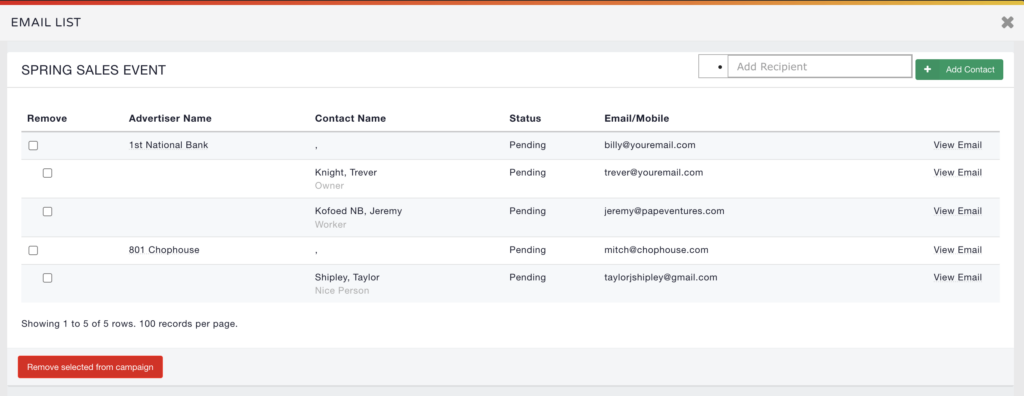
If you need to modify who will receive the campaign, click Contact List. From there, you can add new recipients to the campaign or remove existing ones by selecting them and clicking the Remove Selected from Campaign button.
After the Email Campaign Goes Out #
After your email campaign has been sent, you can manage and monitor it by going to the Campaigns tab. From there, use the Options menu next to any campaign to take further actions. You can Edit the campaign, Preview its content, view Bounces, Clone it for reuse, or check the Contact List to see exactly who received it.
Tip: A helpful best practice after sending a campaign is to take advantage of the Clone feature. This allows you to quickly resend the campaign to specific groups — whether that’s everyone who received it the first time, only those who didn’t open it, those who did open it, or recipients who clicked a link. It’s an easy way to follow up and boost engagement without starting from scratch.
Within the Campaigns view, you can also track performance in real time. Keep an eye on important metrics like total opens, clicks, delivery status, and other campaign details — all in one place.

