The big goal here is to put all of your data into one place. MediaOS tracks every advertising data point and puts together a single report with impressions, clicks CTR, etc. It’s simple: After you assign items within MediaOS, everything syncs to the ad server in real time, giving you instant, easy-to-read data. This article will explain how to configure your website for ad server service.
NOTE: The MediaOS Ad Server is blocker-proof. This means your ads will be displayed to everyone, even if they have ad blockers. How does it work? Our ad server is a moving target, generating new and random information every hour to trick ad blockers.
How to Download the WordPress Plugin #
- From your MediaOS account, click on the Delivery icon on the left sidebar.
- The next page will show several options at the top: Line Items, Requests, Content, Flat Plan, Ad Server, Social, Studio, Distribution. Click on the Ad Server tab.
- NOTE: The Ad Server is ONLY compatible with WordPress.
- You will see two sections on the Ad Server page: Websites and Newsletters.
- To setup WordPress, select Website section on the Ad Server page, hit the New Website tab on the right side of the page
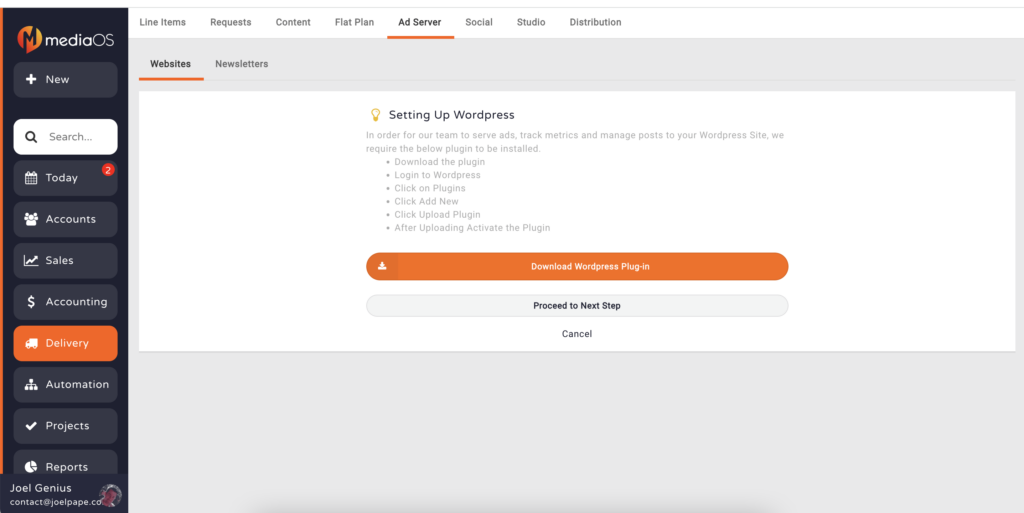
- The next page will have instructions on how to download the WordPress Plug-in (pictured below).
- Once you download the plug-in, you need to go to WordPress.
- Click the Plugins icon on the left toolbar, then click Add New on the dropdown menu
- Hit the Upload Plugin button at the top of the page
- On this page, you will also have to upload a .zip file. Download the file from MediaOS and upload it into WordPress
- Once the file is uploaded, click the Installed Plugins icon on the left toolbar.
- Click the box next to MediaOS Services to activate the plug-in.
Configuring Your Site #
- Once you have everything set up on WordPress, navigate back to MediaOS.
- Click the Proceed to Next Step button
- Type in the name of your website and its URL where prompted.
- Type in your Login Username and Login Password where prompted so that MediaOS can connect with your site.
- Next, click on the box labeled Assigned Products
- From the dropdown menu, specify which products loaded into MediaOS you would like to be available to the website. For example: Time-based or CPM-based products. You can also choose the general run of the site button.
- NOTE: A product/products can only be assigned to a single site. You CAN have multiple products, but they CANNOT be shared across multiple sites
- After you have made your selections, click the blue Connect button
- The Website section will update to show that your website is up-to-date. You’ll see the up-to-date status listed under Version.
Adding Widgets #
- Once everything is connected, go into WordPress and click on the Appearance tab on the left toolbar.
- Click Widgets from the dropdown menu.
- Click the tab labeled Footer.
- Hit the “+” tab.
- Type “MediaOS Ad Server” into the search bar.
- Click on the widget that appears.
- Within the MediaOS widget, you will need to specify ad sizes. Choose which sizes you want to use in a specific location on your site by simply checking the box next to the desired size.
- In the Ad Units box, select which ad sizes or units from MediaOS you want to allow to display in a specific location. NOTE: Time-based ads get priority, followed by CPM-based ads. If this isn’t your preference, you can customize which types of ads get priority, if any. After you set your preferences, congrats! You’re configured.
Setting Up Ads to Run on Your WordPress Site #
- Navigate back to MediaOS
- Click on the Sales icon in the left toolbar
- Click on your desired proposal
- Click the Edit tab. A dialog box will appear
- Type “Schedule.com” into the search bar. It will appear in the Website list.
- Click the Add to Proposal button
- Choose which unit you’re selling using the box labeled Unit/Size. A dropdown menu will appear with options.
- Next, use the Date Range box to choose when you want to sell.
- Below these boxes, you will see another box labeled Website Categories. Choose which specific categories you want this ad to run in. If you don’t choose, MediaOS will randomly run the ads, prioritizing according to category.
- NOTE: The options in the dropdown menu are coming in real-time from WordPress.
- Once you’ve made your choices, click the Add Items button to the right.
- Assign ads to the empty fields and that’s it, they’re ready to run!
Setting Up the Ad Server for Newsletters #
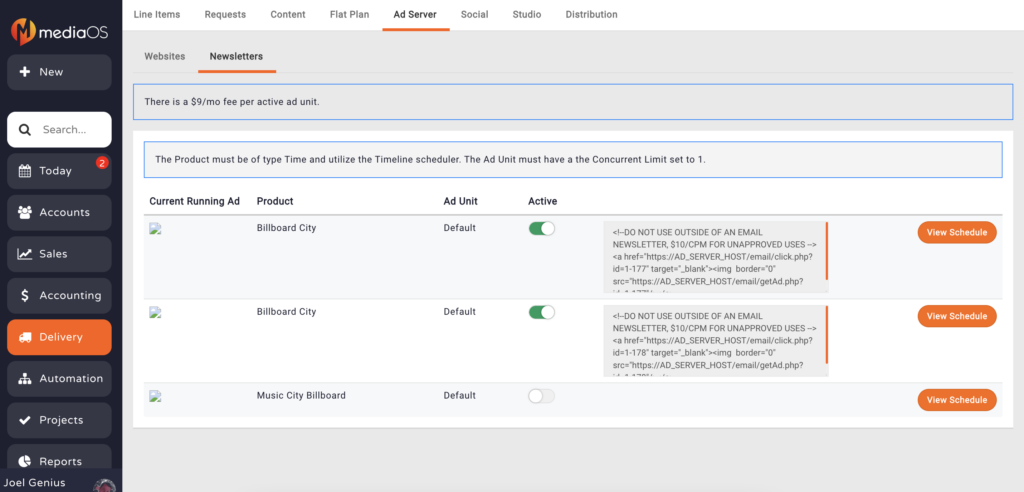
- In the Newsletters section on the Ad Server page, hit the New Website tab on the right side of the page
- Grab the HTML displayed next to the ad unit you’ve selected. It will be next to the Active button
- Drop the HTML into your email newsletter
- MediaOS will track all clicks and impressions
- NOTE: In order for the ad server to be compatible with your newsletter, the ad unit must be time-based, use the timeline scheduler, and have the Concurrent Limit set to 1.
Checking Metrics #
- Click on the Delivery icon on the left sidebar
- On the next page, you’ll see several options: Line Items, Requests, Content, Flat Plan, Ad Server, Social, Studio, Distribution
- Click Line Items
- Choose the item you want data on.
- The stats for this single line item appear here in real-time.
- You have the ability to generate a QR code for this line item by clicking the Tracking QR Code tab
- You can also generate a tracking link for this specific line item by clicking the Tracking Link tab. You can use this link for social media, your website, editorial content, etc. NOTE: Tracking links and QR codes do not track impressions. Everything is tracked as a click.