The Websites feature is basically the core of the MemberOS service, so it’s very important to make sure you have everything set up correctly.
After clicking on the Websites tab on the left side of the screen, you will see 9 options:
- Websites
- Store
- Ad Server
- Lists
- Pop-Ups
- Directory
- Events
- Voting Analytics
VERY IMPORTANT: Before setting up your main tabs, you need to have your settings in order
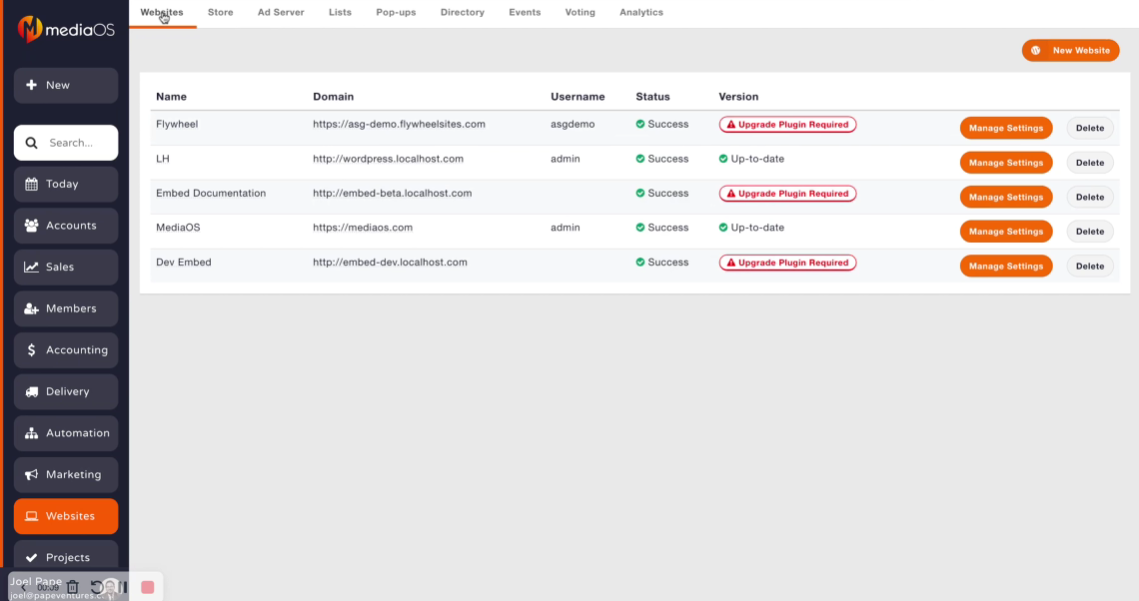
You will see an orange button labeled Manage Settings. Your settings tab is where you have the ability to adjust forms, email templates, branding guidelines, etc. After you click the Manage Settings button, you will see several secondary tabs.
- Website
- Ad Server
- Analytics
- Registration
- Branding
- Pages
- Forms
Note: These tabs are not the same as the previous nine listed on the main page.
What Each Tab Does and How to Set Them Up
Website #
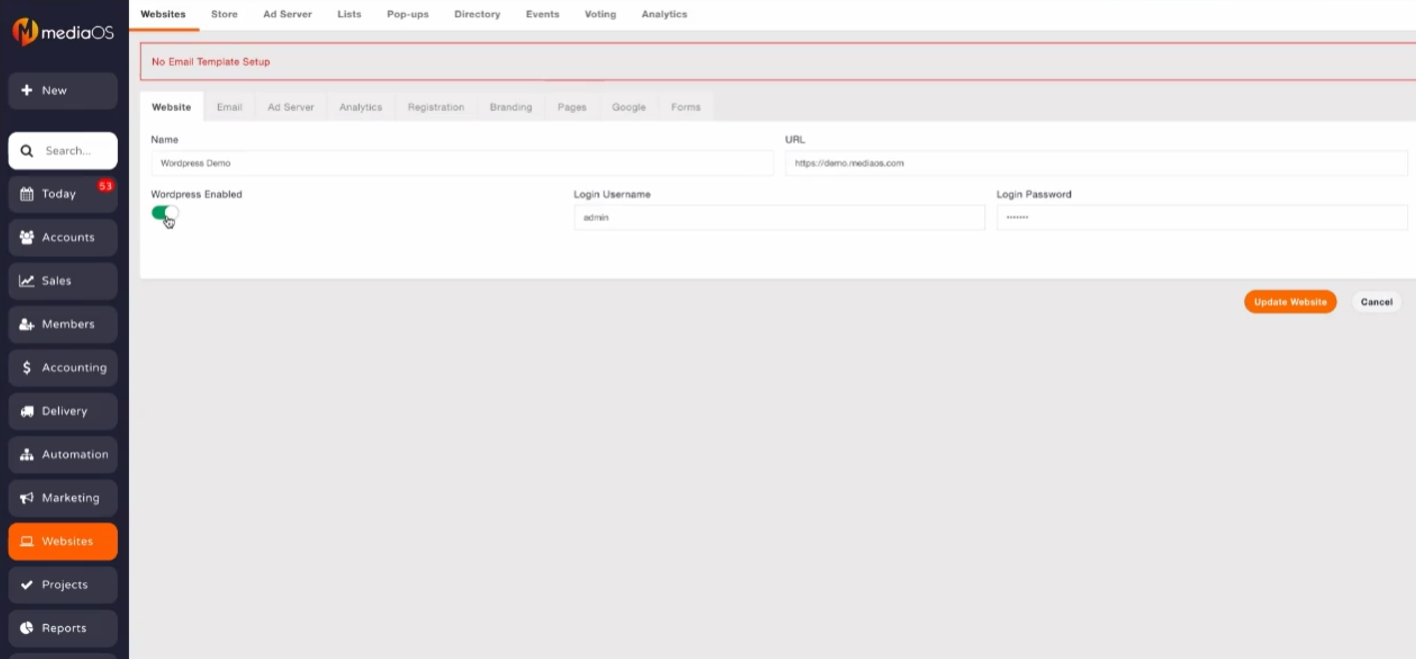
Let’s take a look at that first tab, the Website tab. In this tab, you can decide on the name and URL for your site. There is also a toggle switch that allows you to enable WordPress. Note: Turning the switch off will disable certain features. You also have your login username and password. This is the information you use to login and edit your site. Everything on this page is fairly straightforward. Simply enter the information prompted – and make sure you don’t have any typos.
Email #
The email tab is not the place to draft, send or automate emails. Instead, this is where you can adjust your core email templates.
- The Email Core Template is whatever people will receive when they register for membership on your website. To set it up:
- Hit Change Template > Edit Template.
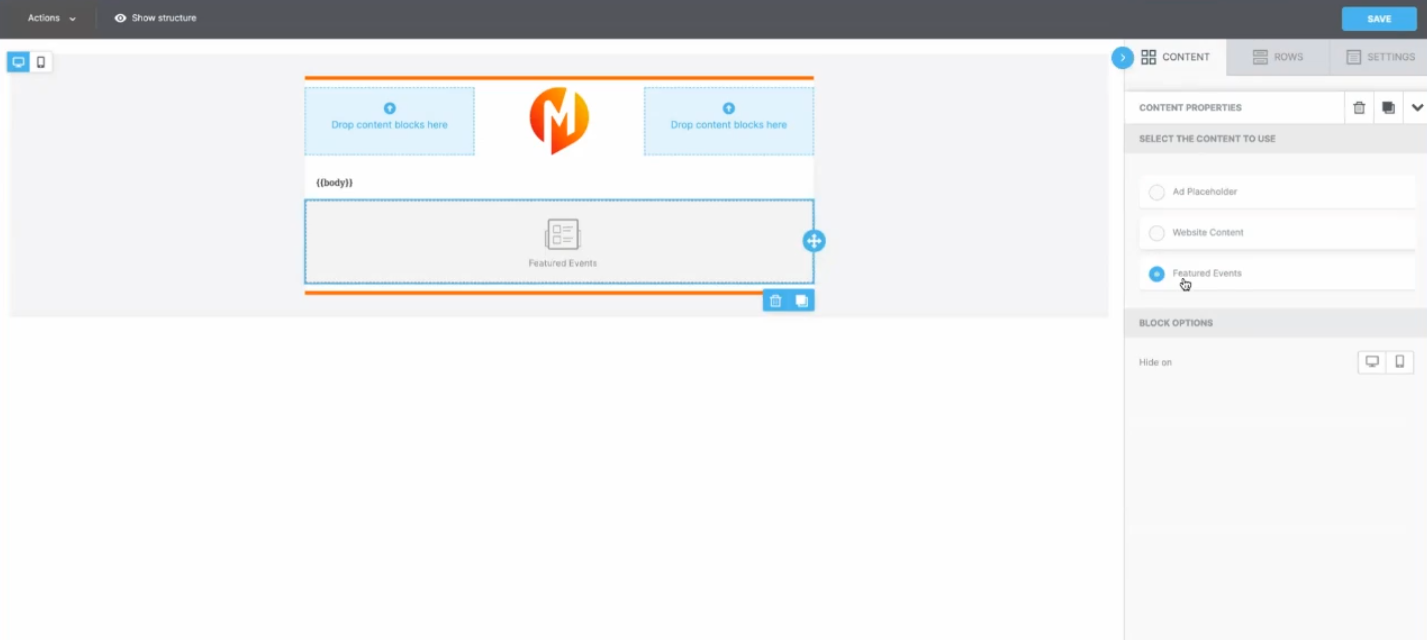
- You’ll be redirected to the template builder, where you can drop in different kinds of dynamic content into your template.

- The area set aside for the body of your template will automatically put in all of the corresponding information you specify. It’s the merge tag that will include all of the information for automated emails, whether you’re building a membership registration form, business directory confirmation, etc.
- To add in elements, simply drag and drop them from the right side of the screen.
- The Dynamic Content option allows you to drop in ad placeholders, website content and featured events. These are the three big dynamic content pieces that go into building templates inside the system.
- Ad Placeholder: Often used when building newsletters. By dropping an ad placeholder into your template, you’re telling it that an ad will go there. When you’re in the ad server, you specify which position the ad goes in and it will automatically service it.
- Website Content: This is for smart content. You tell it what content you want to be placed there, what’s popular, best fit for demographic, etc. and it will automatically fill it.
- Featured Events: Whatever events you want featured. You can select that in the Events section of Websites.
- Hit Save. You’ll be redirected to a page with your sending details. Make sure your logo and the body merge tag are on your template, then specify your sending details, like your email address and name.
- The Checkout Receipt Template is what people will get when they make a purchase. It is basically the receipt that people will have sent to them. To set it up:
- Hit Select Template.
- Adjust to your liking using the provided templates and features.
Ad Server #
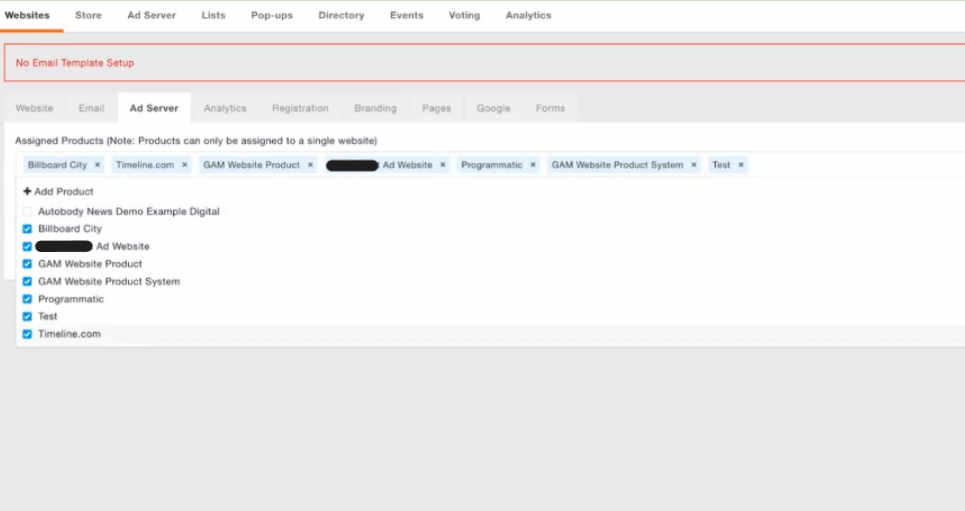
The Ad Server tab is where you pick which products are being sold via the ad server inside MediaOS. By hitting the dropdown labeled “Assigned Products” you will see all of the products that are compatible with our ad server. You can also find the products in the Products section. In order to be listed here, products must meet three main criteria. They must:
- Be time-based
- Have scheduler attached to them
- Have inventory associated with them
In the box labeled “Change Ads Every X Seconds” you can specify how often you want to change ads. Think of this like those electronic billboards you see on the highway. You get to set the rotation and decide when the ads change.
Analytics #
This is where you can decide if you want to track the way ads are interacted with. For example, do you want to track if someone is hovering on an ad, if they click on an ad, etc.? Use the toggle switch to enable analytics.

The box labeled “Ignore Analytics of Visitors Less Than X Seconds on a Page” will help you try to prevent people gassing up numbers. There are ways to artificially bump up CPMs – which is shady business we typically try to avoid. If someone is on the page for less than five seconds, it’s probably not the kind of person you want to track. To enable this feature, simply click on the dialogue box and specify the minimum number of seconds you want to pass before tracking begins.
Registration #
The registration tab is fairly straightforward. This is where you decide whether you want to ask registrants for their names and/or their company name. This would occur when someone is on your site and clicks the “Join Now” or “Register” button you have set up. Simply flip the toggle switch to make it so that new registrants are prompted to fill in the information you would like.
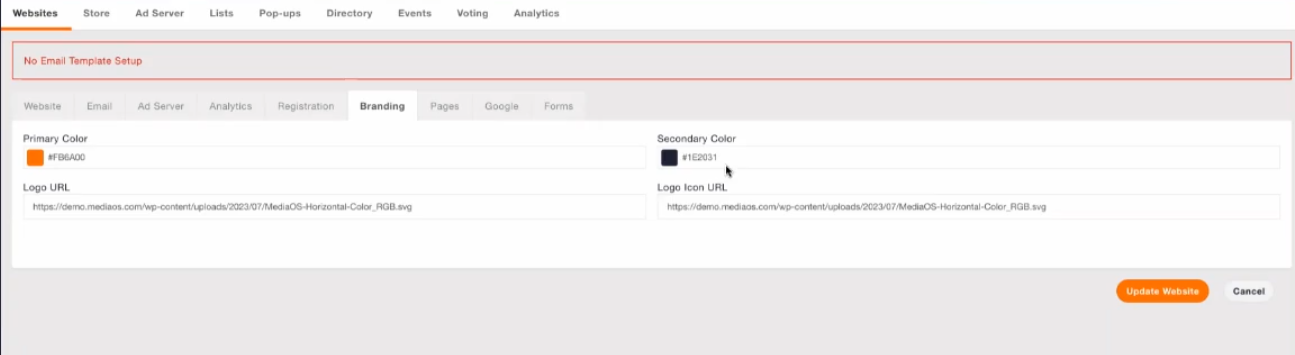
Branding #
The branding tab allows you to specify several important details, including:
- Primary Color
- Secondary Color
- Logo URL
- Logo Icon URL
Simply enter in your branding information and hit Update Website. Note: Everything set to default will change to match these specifications. Note: Templates that have already been created will have to be adjusted manually.
Pages #
This tab allows you to determine where common pages are set up. This works in tandem with the selections that you’ve made so far, but it requires that you build a page on your website for each URL. Once you have the page built, simply go to this tab and enter the URL into the box that describes what you want the page to be.
Google #
Under this tab, you’ll see boxes labeled Google reCAPTCHA and Google Maps.
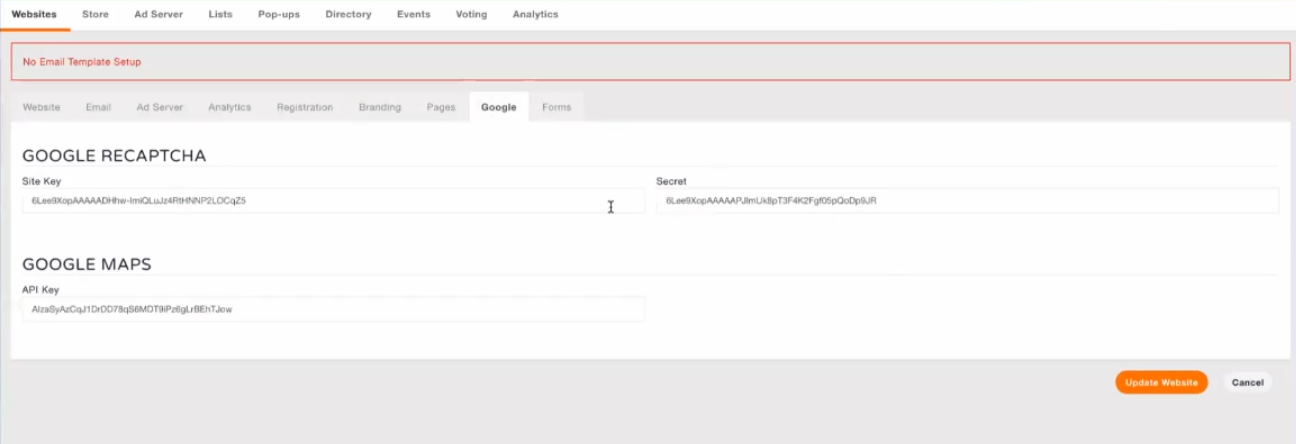
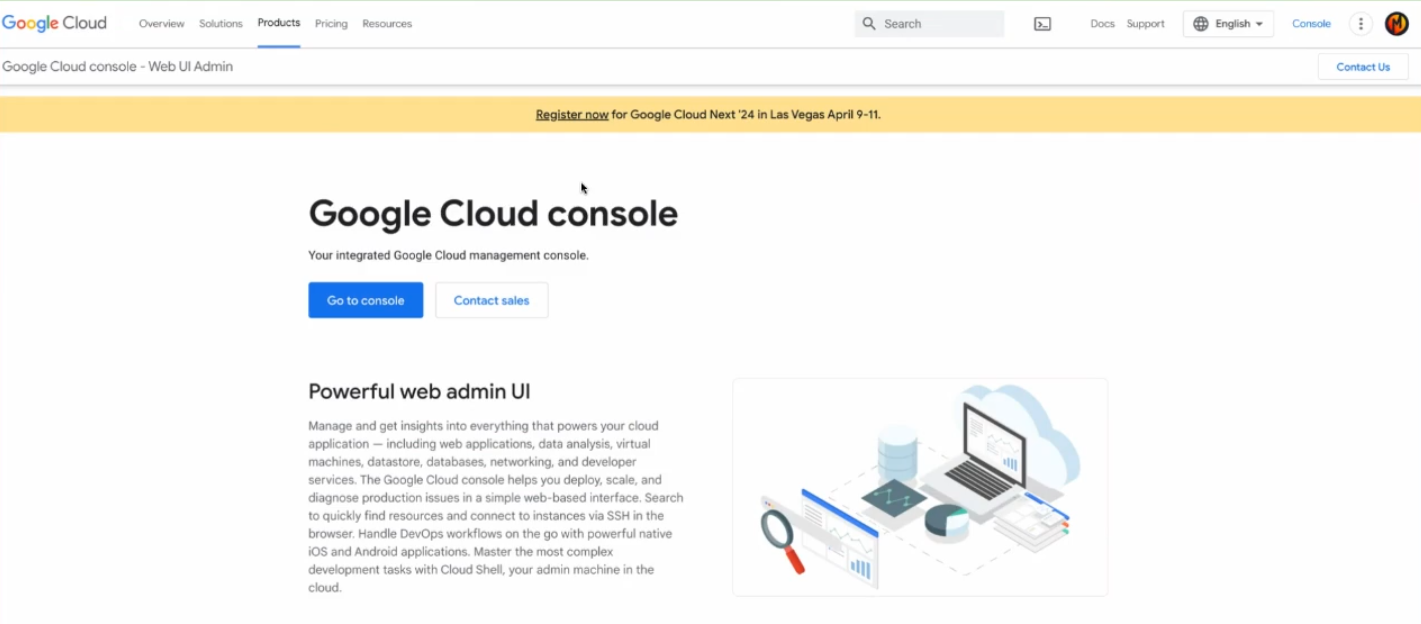
To set up your Google tab, you need to go to Google Cloud Console. This is a way for you to pull in certain API features from Google into the website. This is where you’ll pull analytics, security functions and location services for your business directory.
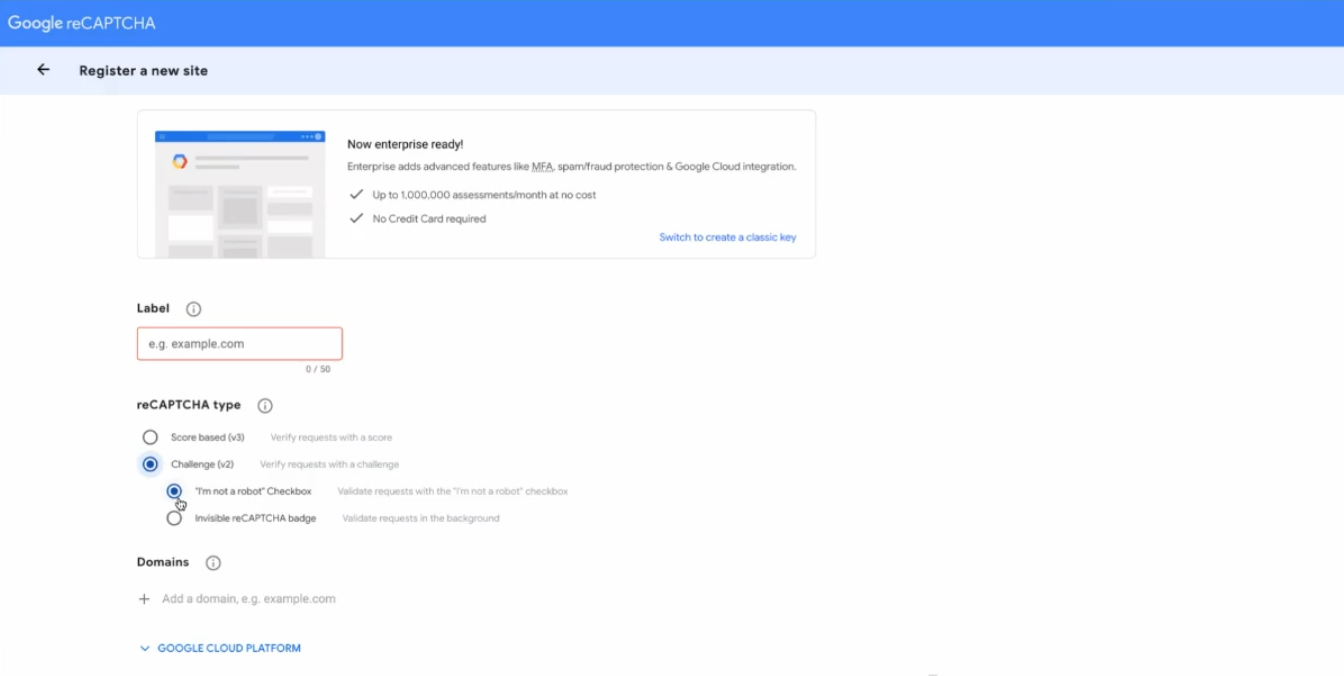
- Google reCAPTCHA: This is the “prove you’re not a robot” stuff. To set it up:
- Go to Google (more specifically, go to google.com/recaptcha/admin/create).
- Select the reCAPTCHA type. Typically, you’ll go with Challenge (v2).
- Select the type of challenge you want to set up. We recommend the “I’m not a robot” challenge.
- Type in your domain in the Domains section.
At this point, you should get two codes, a Site Key and a Secret Key. Copy and paste these codes into the Site Key and Secret boxes in MediaOS. Remember to keep reCAPTCHA codes private. If someone gets a hold of these codes, they can blast things with traffic, get past your security, etc.
- Google Maps:
- Go to your Google Cloud Console.
- Select APIs and Services
- You’re going to want to build a product, so select “My Project” and specify your project’s name.
- In the search bar, type “maps api.”

- Select APIs & Services (Google Maps Platform) from the dropdown.
- From the list of products, you’ll want to enable most of them.

- Select Keys & Credentials from the side menu.
- Hit Create Credentials
- Select Edit API Key
- You’ll be redirected to a page where you can add in some restrictions and filters. Make sure to specify the site where the key is allowed to be used.

- Once you have selected your restrictions, copy and paste your API Key into the box labeled API Key in MediaOS.
Forms #
The forms tab allows you to set the brand guidelines for your forms, including border specifications, text color, label size, etc. It’s pretty straightforward, just enter in your specifications into the corresponding boxes and viola! Everything set to default will change to match these specifications. Note: Templates that have already been created will have to be adjusted manually.

Once you have set up all nine of these tabs, you are ready to get started with the other features in MediaOS!
The Main Tabs #
Now let’s move on the main set of tabs under Websites. There are a few things you’ll need to set up right off the bat to make sure everything runs smoothly.
Setting Up Your Ad Server #
Connecting Your Website
Before you can set up your Ad Server, you will need to connect it to your website. Simply click on the Websites tab along the top of the screen. Then:
- Click the orange New Website tab on the right hand side of the screen
- Click the option to Download WordPress Plug-in
- Follow the instructions
- Type in your username and password
- Install the plug-in inside of WordPress
Once that’s set up, you will be able to adjust the settings within your website tab, including specifying whether it’s a WordPress enabled site or not.
Specifying Your Products
In the Ad Server tab, you need to specify which products are supported by your specific website. Do this by typing them into the Assigned Products dialogue box. Things to keep in mind when specifying products:
- Products can only be assigned to a single website
- Products need to be either a CPM-based product with a start and end date OR a shared voice ad
Embedding Ad Server In Website
After you’ve specified your products and connected your website, we will generate an HTML. All you have to do is drop the link in order to embed the Ad Server in your website.
- Navigate to the Products tab and then select your website
- Click the option labeled Ad Server.
- A pop-up box labeled EMBED CODE will appear with your link
- Copy and paste it into the HTML of WordPress wherever you want it

Note: Each link will only display one specific ad unit. If you don’t care what ad runs where, then only copy the main part of the HTML. It will then serve any ad it possibly can on your website.
Selling Targeted Ads
Once you have your ad server embedded into your site, click on the Sales tab.
- Create a new contract proposal
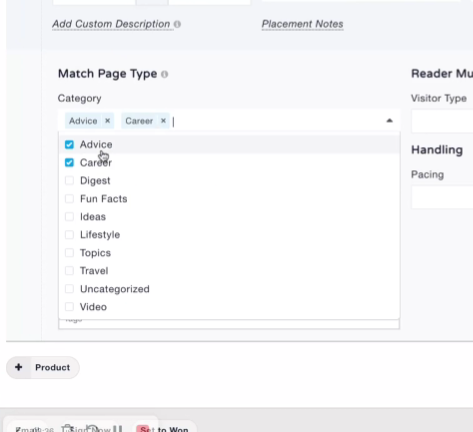
- Specify your unit size, quantity, etc. Note: You can target readers based on their audience and other specifications. Click Get Audience Count to get estimates of what’s available.
- You can specify unit size and which dates you want the ad to run between using the dialogue boxes at the top of the screen. Keep in mind, you can target the individual ad based on different pages. This means you don’t have to put specific ad units everywhere, you can just put generic ones wherever you want, then go back in later and target the sections, specific pages, authors, tags, types of pages, etc.
Note: In order to use the Reader Must Be feature, you have to be using our full audience member platform. If you’re using that, you’re able to use the Reader Must Be feature to target specific groups or to not target specific groups.

- The Reader Must Be feature will look at the website and create your Forecast Inventory, which looks at your website and shows you your current page impressions as well as anticipated future impressions. This feature breaks it down by device, known vs. unknown, etc. This will give you an idea of what inventory will look like across different pages and categories.

Once you enter in your specifications and add your item, you’re done. The information is loaded and ready to go.
Assigning Your Ad
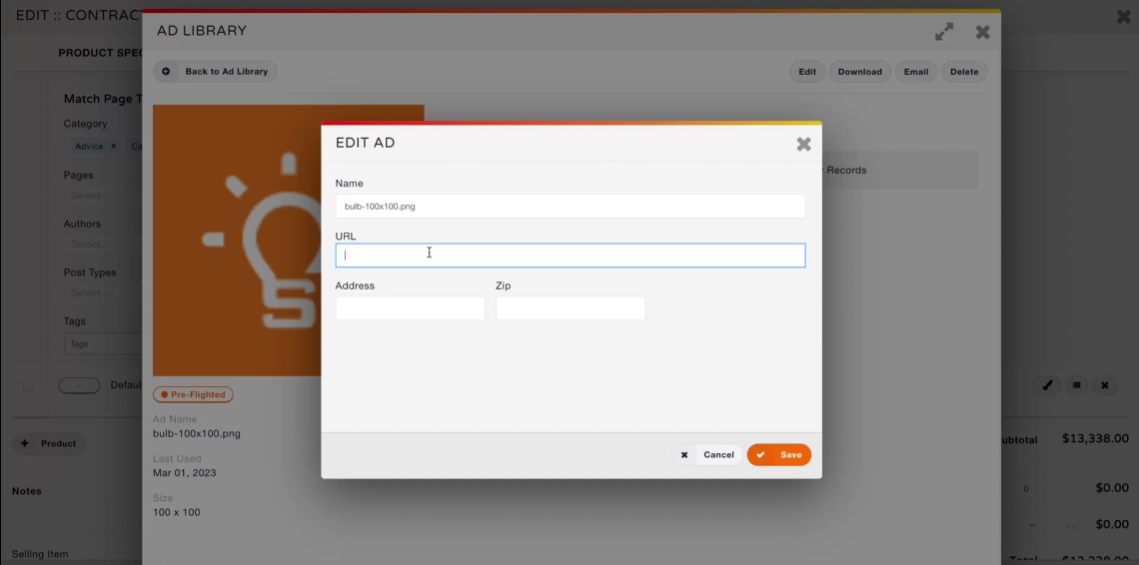
In order for an assigned ad to run, it MUST have an end URL. No end URL = no running. In your Ad Library, click on the ad you want to run and select Edit. There will be a dialogue box where you can put the URL.
Keep in mind:
- You can select multiple ads at once
- The system will automatically try to run the most size appropriate for the space of where you’ve put the ad unit. It will also automatically handle spacing for desktop, tablet and mobile.
- Once ads run and stats start coming in … you’re not done! There are more great features that can improve your ad experiencing.
Ad Stats
Go to Account > System Settings > General Settings to make it so that ad stats are automatically included on invoices.
- Search “invoice”
- An option labeled “Include Ad Server Report” will appear

- Toggle the switch on if you want ad stats to be included on invoices. It will show the most recent 90 days of activity for the account.
You can see these changes reflected when you preview your invoices.